CO2cloud Software
Software selection
For the required functions and the hardware used, the development environments for the ESP8266 have the appropriate libraries and you can put together a suitable program relatively quickly.
But it gets even easier with one of the available controller systems (Tasmota, ESP Easy), which bring everything out of the box and just need to be configured. Since I have been freeing SONOFF devices with Tasmota from Chinacloud for some time, I have chosen Tasmota.
Tasmota flashen
Tasmota is available as a binary in different variants depending on the planned application area. Sensors are usually only available in the sensor version, so we need tasmota sensors.bin in the current version.
With the variant with an IR-LED for remote control of the TV device in the room, tasmota-ir.bin would be necessary, which does not contain sensor support (which binary contains which functions can be found in detail here). In this case, we need to compile our own Tasmota Binary with IR and sensor support.
Flashing is easiest with the Tasmotizer. Connect ESP8266 to the computer’s USB port, flash with tasmotizer, so that the Wi-Fi data is then transmitted and wait until Tasmota has connected to the WLAN. The tasmotizer then displays the assigned IP address of the device. Now the device can be disconnected from the USB port and powered by its own power supply.
Configuration
Now the IP address of the device is entered into the browser and the device logs in with the default menu. With –> configuration you get into the configuration overview. First of all, we choose Configure Other and assign a web password. Here you can also give the device a name and, if necessary, enable MQTT.

Configure Module provides device configuration, in which the connected sensors/components are assigned to the GPIO pins used. The following settings are required:
- Module type –> Generic(18)
- D4 GPIO2 –> MHZ Rx
- D7 GPIO13 –> Buzzer (or IRsend)
- D5 GPIO14 –> MHZ Tx
- D8 GPIO15 – -> WS2812
If you have enablet MQTT, the MQTT parameters (Servers, Credentials, Topics) still have to be entered under Configure MQTT. Tasmota then reports its data to the MQTT server every 5 minutes. This interval can be changed under Configure Logging – Telemetry Period (or later via the Console).
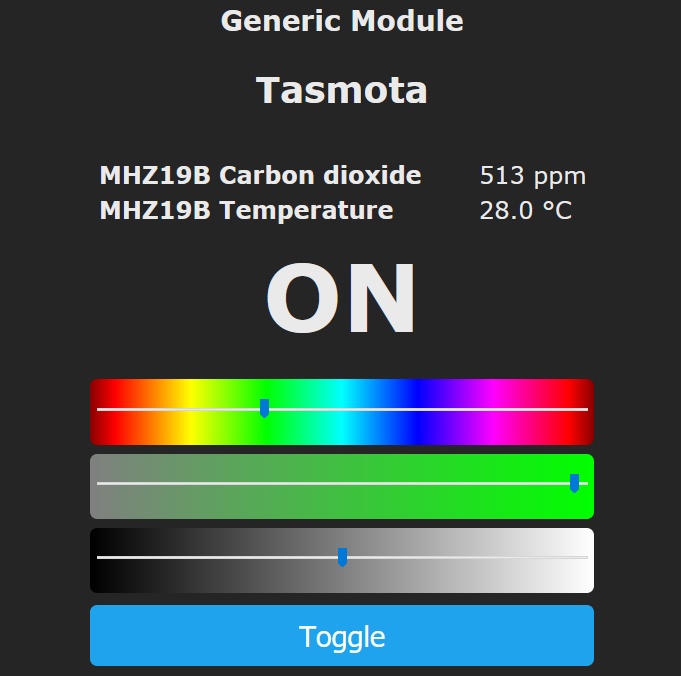
The measurements of the MH Z19B should now appear in the main menu after a short time. However, the reported temperature does not correspond to the room temperature and some models of the MH Z19B also report values around 0. For a temperature measurement we would have to give the device a BMP280. Since we have configured LEDs, the corresponding controllers for them also appear in the main menu, which also work immediately.
The other settings must be made from the Console point. This takes you to a console where a variety of commands can be placed and where you can also receive corresponding feedback.
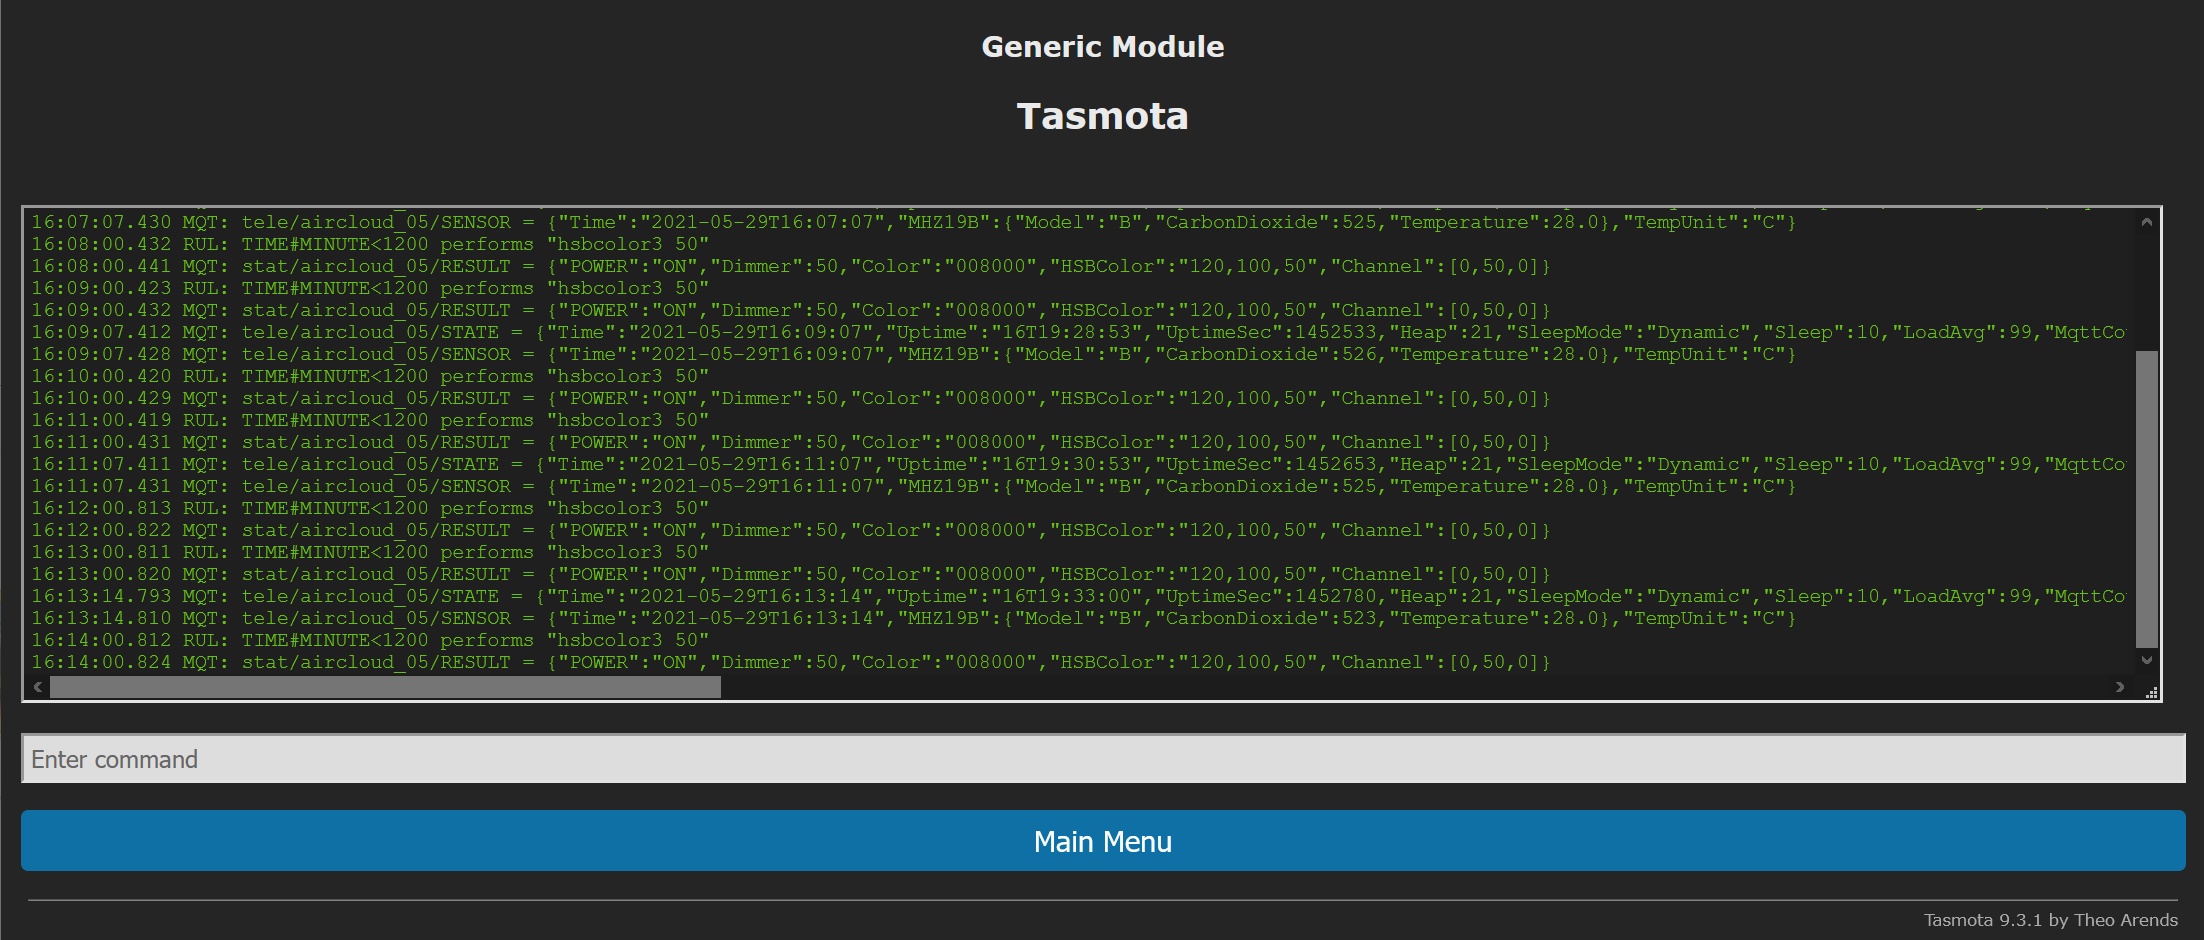
The following settings must be made here:
savedata 0
To conserved the flash memory, the constant storage (every second) of the parameters is switched off, because you can get many thousands of writes so quickly (read under menu item Information).
Attention: This means that all further changes are no longer saved automatically and must be saved manually (see last command). This also applies to the later rule definitions.- setoption0 off
To conserved the flash memory, the constant storage of the state (intended for restart after power failure) is switched off. Since each measured value changes the state (color) you also get many writes with it. setoption18 on
Magic happens here! We pair the CO2 sensor with the LED color! From now on, the color of the LEDs changes according to the measurement results of the MH Z19B sensor. Fix preset is green to 800ppm, red over 1200ppm and a gradient in between. These limits can only be changed by compiling the binaries, but have turned out to be well chosen.timezone 99
Time indications take into account summer/winter time.poweronstate 0
When restart/power up, turn off the LEDs. Default is last state, but it’s wrong because we don’t save it.teleperiod 120
Here, the time intervals (in seconds) the measurement results are reported to the MQTT server is determined.- restart 1
This saves the changes and restarts Tasmota.
The final touch
In Tasmota you can define 3 event driven rule sets to implement an automation (see Rules). The rules must be entered in one line at a time.
rule2 on tele-MHZ19B-CarbonDioxide>1200 do buzzer 1,1,1,0xa8eee2a break on tele-MHZ19B-CarbonDioxide>900 do buzzer 5 endon
The built-in buzzer is controlled with rule set 2. At a CO2 value above 900ppm it beeps 5 times, from 1200ppm it beeps SOS.
rule3 on time-minute<480 do="" hsbcolor3="" 20="" break="" on="" time#minute="">=480 do hsbcolor3 50 endon</480>
It has been shown that the good visibility of the display by day at night is perceived as disturbing. Therefore, the brightness is reduced from midnight to 08:00 to 20%, otherwise it is 50%. Alternatively, it can be reproduced before midnight, which makes the rule a little longer and looks like this (20:00-08:00):rule3 on time-minute <480 do hsbcolor3 2 break on time#minute <1200 do="" hsbcolor3="" 50="" break="" on="" time#minute="">=1200 do hsbcolor3 2 endon</1200>
RULE1 ON System-Init DO color #000000 ENDON ON Mqtt-Disconnected DO led1 3 ENDON ON Mqtt-Connected DO color #404040 ENDON
This rule is used for testing and to see what the device does in normal operation. The device lights up blue when it loses its connection to the MQTT server and knows when it receives it again or when the device is restarted. The color is overwritten by the CO2 display after a short time.
important! The rules must be explicitly activated:
RULE1 1
 RULE2 1
 RULE3 1
calibrate
Finally, the sensor must be calibrated. Tasmota 2 offers possibilities for this (see sensor15).
- By default, the AutoCalibration is activated by Tasmota (command
sensor15 1). Thus, the sensor calibrates itself based on the lowest measured value of the last few weeks. For this to work, it is best to put the device outdoors for 20 minutes or ventilate the room particularly well. This should be repeated regularly (i.e. at least 1 x a month properly ventilate). - Alternatively, you can switch off the autocalibration with
sensor15 0and calibrate it in well-ventilated space or outdoors bycommand sensor15 2.This should also be repeated from time to time (every 3-4 months).
Leave a Reply